Tuesday, July 30, 2013

Is it time for a major cut?


7 Questions to Ask Yourself  (before the major cut)


Is less more?

Since you can't - or shouldn't? - take hair that fell onto the floor and stick it back onto your head, one option is to go with a cut that's less drastic, then cut more off later. If your immediate reaction to this question was, “No, I wanna go all the way!” you're probably ready for a major change. Even so, you can always research less extreme cuts, in case you feel hesitant after climbing into the stylist's chair.


Do you know exactly what you want and who is likely to deliver it?

With a little planning, we curlies can greatly increase our odds of getting a terrific cut. It helps to get specific about what we want and don't want, and communicate that to the stylist before the scissors come out. Two ways to do this: First, show the stylist pics. Second, specify how much hair you want taken off. Google pics of your desired cut from all angles possible and bring the images to show your stylist. Ideally those images approximate your curl pattern and texture. Decide how much hair you want cut off (quarter inch, half inch, inch/es … rough estimate). Do you want it cut wet or dry? Not sure? Google it. You can research curl-specialty cuts like the “Deva cut” or “Ouidad cut” to help you decide.

As for who is likely to deliver a great cut: Once you locate a salon/stylist of interest, search consumer review websites like yelp to ensure the stylist has a good reputation and is good with your type of curly hair. I've done this by googling “[name of salon or stylist] reviews”. Several review sites usually pop up. If you want, you can also call for consultations.

How much maintenance will be required?

Consider what tools and accessories you'll need after your cut. Styling may take longer. New or different styling products may be required. You may need more frequent trims or cuts. The new regimen may cost more.

Is the cut you want work friendly?

Ideally, your new cut will be work appropriate, unless you despise your boss and want to be joblessly stunning. If you're seriously unsure, it might be best to choose a different cut. 

What are your expectations and what will you do if they aren't met?

Since there's always a possibility your result will be unsatisfactory, think up one or two practical ways to handle a cutting mishap. For ex., if someone cuts your hair too short, it will help if you have a style in mind for a corrective (shorter) cut. Having a contingency plan helps reduce anxiety before going under the scissors. It's also good to bring a head band, hat, or clips to the salon, Those can help you immediately manage a less than perfect cut. And remember: even if a stylist knocks you out and shaves every hair off your head, hair grows back. You'll survive.

If you plan to do a BC (Big Chop), are you ready to accept your natural texture and learn a new routine?

This question assumes you'll be chopping off processed hair to allow your natural curls to grow out. If you can't recall your natural hair texture and curl type, you may end up with something different than you planned for. It's important to research care for various hair types and read about or talk to people who've BCed to understand the joys and challenges of the naturally curly or coily hair journey.

How will you communicate your needs to your stylist?

What will you do if you start feeling uncomfortable with something your stylist says or does? Considering your response ahead of time will make it easier for you to advocate for what you want in the moment. Know that you always have the right to say “Stop!” Don't worry about hurting the stylist's feelings. It's your hair. You don't need to explain yourself. Just say you aren't comfortable and get up. Stylists deal with this response more often than you think. And they have no business insisting you go along with something that you are paying them for. 
                                      
I'd love to hear about your thoughts and experiences. To read another blog of mine on this subject, click on Thinking About Cutting Your Hair? Read This ... 

Have a happy, curly day! 


Thinking About Cutting Your Hair? Read This ...


*  Before reading this post, you may want to visit the 7 Questions page. * After each question is some commentary. The questions can be used as a guide, as you think about whether or not to cut your curls. ... Below are further thoughts on the topic.

The impact of cutting

Whether it's ringlets, coils or waves, most of us ponder a style-altering cut at some point. Cutting off a few inches or more can have consequences and may require more commitment. Curl/wave patterns can change when cut, posing a styling challenge. In general, a well-executed cut offers added body and movement, creates a healthier look, and can simplify a hair care routine and deepen one's love for curls.

My latest cut (and how I reacted)

I cut my hair last month. For part of my adult life it was short, as in neck exposed - all sorts of punk rock hairdos, shaved and unshaved. For the past 10 or so years it's been very long – as in mid-back to tailbone length. In the past few years I added layers, still keeping the length. A month ago I cut it to my shoulders with fewer layers. I do not miss the length at all, love my cut and am hungry for my next shorter cut! I was simply bored with the same long look. Cutting it still felt like a risk, but I did the kind of research discussed on the 7 Questions page. The more diligent my research, the better my reaction to any cut – even a Hellish cut. My nightmare cuts were usually the result of my lacking research into the stylist, or the cut. That and failing to speak up when I didn't like what a stylist was doing. Those cuts made me resentful toward both the stylist and myself. That said, there's no sin in getting a spontaneous cut with little forethought as long the possible consequences are understood. And even if you the cut is horrifically shocking …

Good news: a bad hair cut is just a delayed happy ending

Hair almost always grows back. Most of us curlies have had some really disappointing outcomes. At first it may feel a little hollow, those words “it'll grow back”, but it's true! In the meantime, I've found that a little creativity helps soften the blow: hair bands, barrettes, braids, scarves, hats, new hair color, new collection of fun earrings, bolder makeup … or even a decision to get a shorter, sassier cut. Sometimes it's good to focus away from the hair for a moment and just let it be. If looked at philosophically, the unhappy cut could be an education about what doesn't work well, or an opportunity to cultivate some patience. Or maybe there's no lesson to learn. Maybe the stylist just turned out to do a crappy job that day, despite glowing online reviews. I recall a couple times when the cut itself looked spectacular but was just seven shades of wrong with my particular face and skull shape. I laugh about that now ;)


Tuesday, July 2, 2013

The NYT's Anti-curl Article


An article called “Taming Summer Curls” was posted on June 26, 2013 in the New York Times in the “Fashion & Style” section. It is causing a stir in the naturally curly-haired community. The title of the article is provocative. It implies curly hair must be spade rather than styled; conquered rather than enjoyed.

Two products and one styling tool are featured.

The first product is innocent: a basic styler that locks in moisture.

The second product is alleged to mimic a Brazilian keratin treatment. As many of us curlies know, keratin treatments are used to loosen curls and/or straighten them (but some people only acknowledge it as a means of “frizz control”).

The third product touted as a means to “tame curls” is a flat iron. Yes, a flat iron. That's like handing a Jheri curl kit to someone with bone straight hair and telling her it's a way to “enhance” her bone straight hair. No it's not and never was. It's a way to completely alter her look so that it's the exact opposite of what she was born with ... as are flat irons for curly hair.

Sadly, there's nothing unusually humiliating or disgusting about the NYT article. Once you look beyond your initial irritation or outrage, the truth snaps back into focus: Yes, people – especially marketers and the minion authors they sponsor - can be insensitive. But wait ...

For every one of us curl-embracing curlies I run into, there are ten more curlies who are quick to agree with straighties that their curls are horrible and all they want is straightened hair. When 60%+ of the population has non-straight hair and maybe 80% of those wavy/curly people support straightening products, The NYT is (sadly) playing up the products that most curly-haired people are interested in buying. They are catering to what most of their target audience wants.

Too many straight-haired folks have said things to me like, "Your hair is amazing, but you probably hate it, right?" … Why do they say that? Oh yeah, because too many curlies actually do respond to curly compliments by saying they hate their hair.

If more curly-haired people accepted their waves, ridges, slopes, kinks, corks and curls, the Times and other publications wouldn't feel perfectly comfortable writing articles like the aforementioned. Powerful hair care companies would go out of business overnight.

... I think we proud naturally curly folks need to own that a lot of our curly kinfolk are the reason these straightening articles exist and work. At the same time, thank goodness we're upset about it because it does need to change.

Wednesday, April 10, 2013

Temple Twirling Method (A Curl Set Tutorial)


Intro (Includes before/after pics)
Technique (Includes a step by step guide)
More about TTM

Introduction

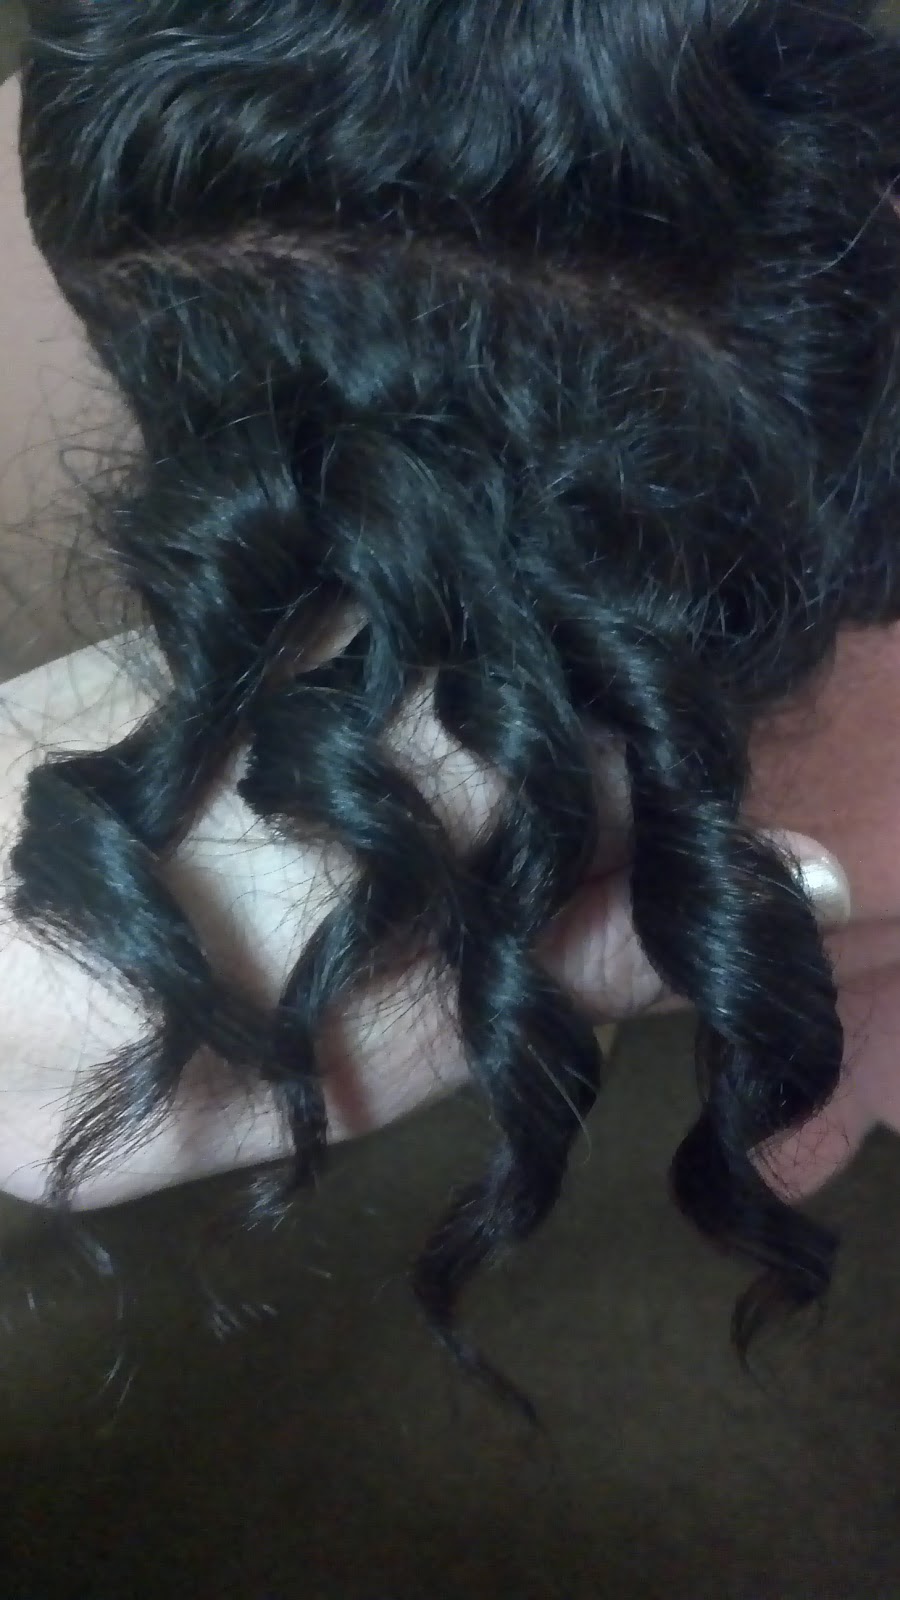
Back when I was a kid, my mom decided the best way to handle my naturally curly, thick mane was to lazily throw it into a high ponytail so everything was reduced to a single curl that looked like this:

        
This is one of my curls today, w/color boost added in Picasa. 


Here's an example of this style on Jessica Alba, except my one curl was positioned much higher, at the crown of my head:


My mom whirled all that curly hair into a single cyclonic configuration, using one or two fingers and the edge of a comb. (I doubt the comb was necessary.) By throwing my hair back into one “twirly curl”, she was taking advantage of curly hair's natural tendency to spiral and clump. And that heinous style was easy to create and low maintenance for her.

Reminiscing about that odd hairstyle led to some experimentation and something I created and call the Temple Twirling Method. It's named after Shirley Temple, the actress and singer. While wet, the look of the TTM set mimics Shirley's hair, although the finished look can be modified to look more natural and less “polished”. Here are quick before and after pics. It's my hair. Please ignore that ungraceful “shelf” of hair in the before pic:


Before


After


     Not better or worse, just different IMO. The is a close up shot, to emphasize the 
difference in curl pattern.


The Temple Twirling Method (TTM) * is created by the simple twirling action of one or two fingers. TTM is one more organized approach to curly styling. It takes advantage of curly hair's natural tendency to clump and spiral. It is most similar to Jonathon Torch's Skip Curl Method * and somewhat like the Unicorn Method * … Admittedly, I'm just too lazy to form dozens of small curls and make the unnecessary “skipping” motion for each curl as required by The Skip Curl Method. The Unicorn Method may work for some, but it turns my curls into an undefined mess.  

Who the TTM set works best on: Ideally, your hair will have a natural tendency to clump and you will probably have a strong curl pattern. This can be any curl “type”, but my best guess is this set will usually work best for curls ranging from 2c to 3c (curl diameter size). 

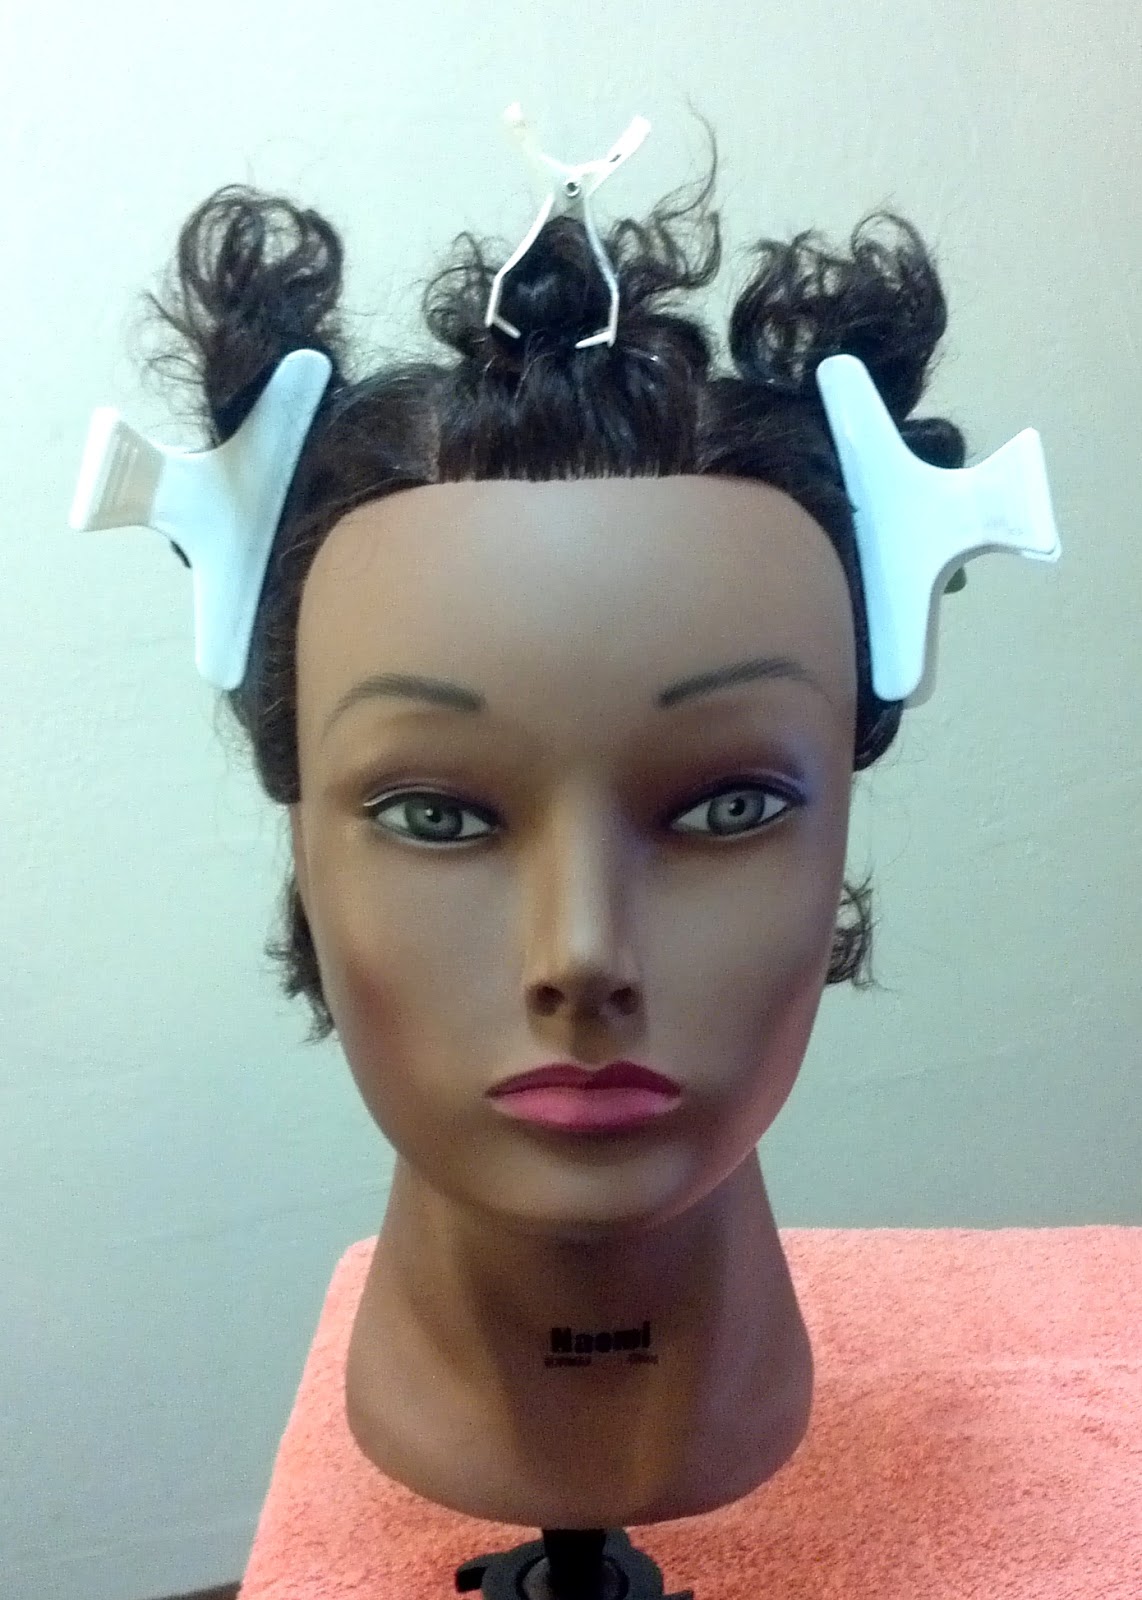
I did a TTM set on Naomi, a beautiful cosmetology mannequin head I recently bought. She came with longer hair but I cut it short.

Here are pics of Naomi's hair before and after the TTM set.


Once dry, more volume can be attained by birthing * (separating) the curls even more than I did here. I'll explain that method below.                            


Technique

Arranging sections: After clearing tangles from your wet hair, apply a liberal amount of leave in conditioner and/or styling gels/foams, etc. Conditioner alone can act as a setting lotion for the “twirls” you create, depending on how much your hair tends to clump, and the relative humidity in your area. If you use too little conditioner, the curls may not clump well. An excessive application will reduce volume and may weigh hair down. Better to err on the side of excess, because you'll be squeezing moisture from each section later in this process.

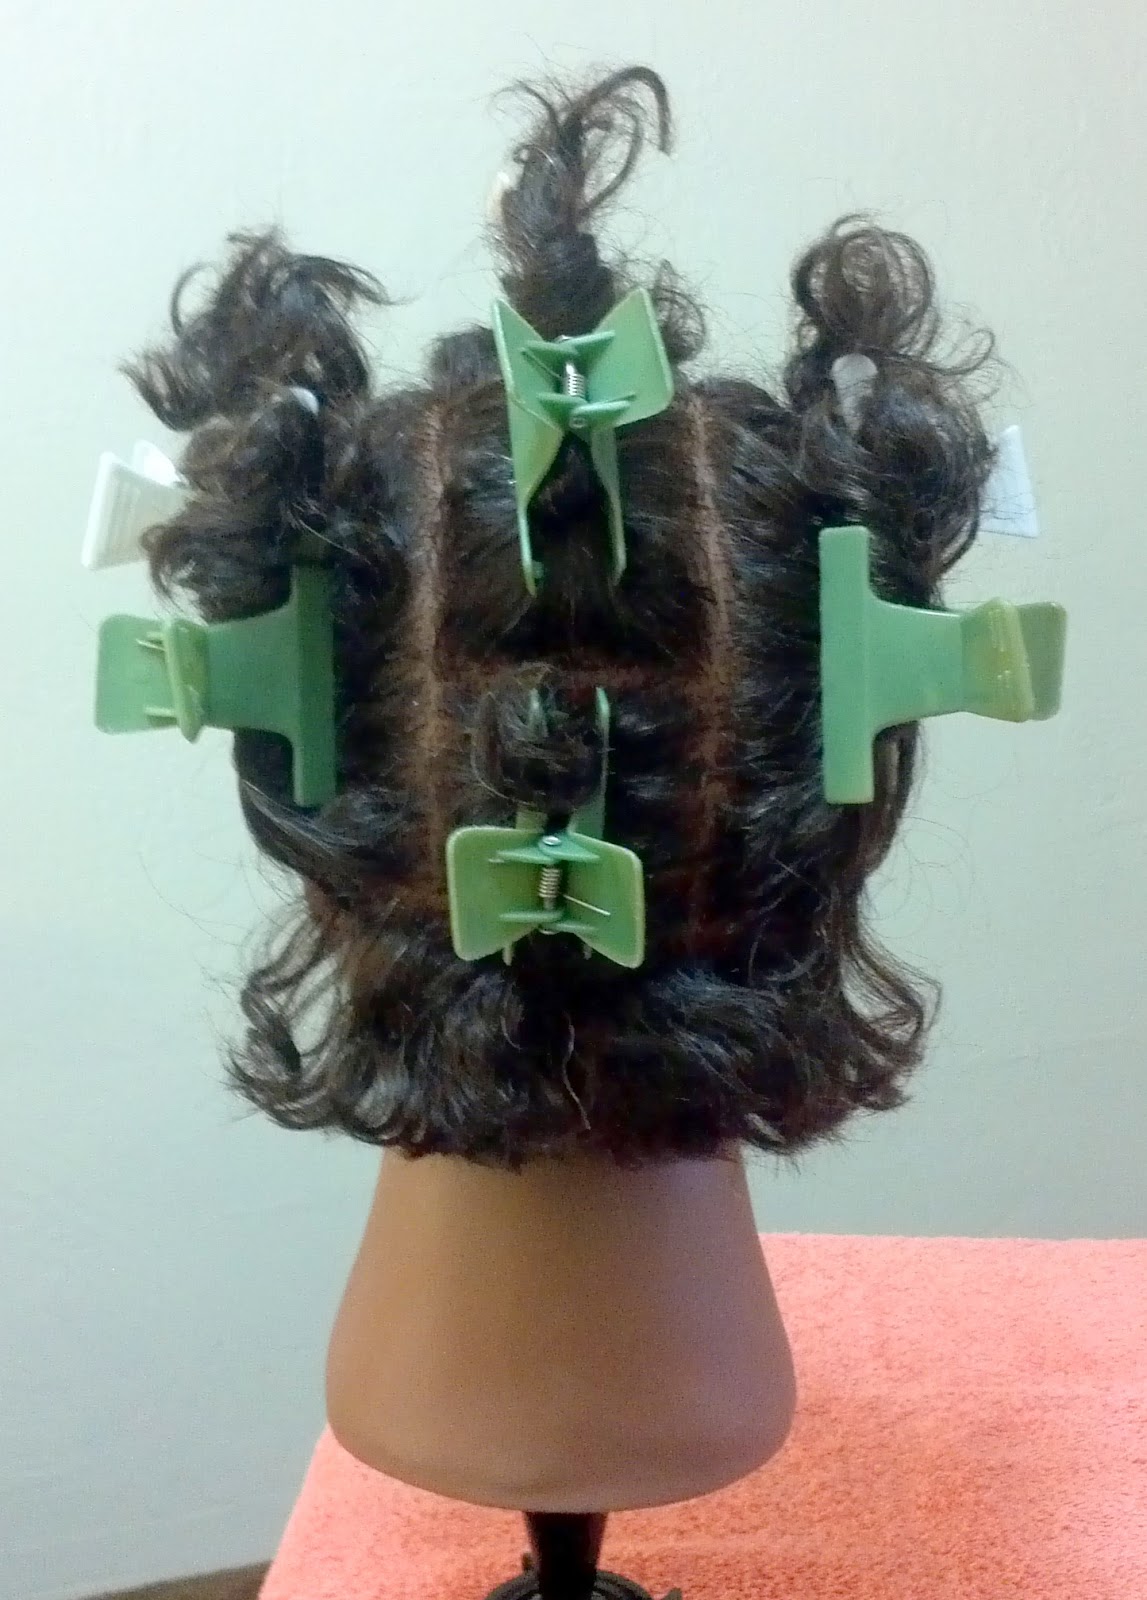
After applying product, section hair. Depending on how much time I have, I usually part my hair into about 4 to 6 sections, but up to 9 works well for me. You don't have to be exact. Basic linear parts should be fine. Diagonal parts are trickier, but the hair will lay more naturally once it's dry and birthed. Here are some views of linear sectioned hair from various angles:


Finger twirling each section: Twirl each section of hair around you finger, either clock-wise or counter-clockwise. You can use one hand or two, whatever feels most comfortable. My approach is below (quick demo on dry hair):

                                             Using one hand


                                                                    Using both hands


Here are some "finished" twirls: 


For added volume: The larger the sections and the thicker the finger twirls, the more volume you'll get and the looser your curls will be. You can vary section sizes for more or less volume at different parts of the head. For example, for volume on top, form larger twirls at the crown. I like to position crown curls at a 90 degree angle for maximum volume, like this:


Position your hair.
Twirl it.
Lower your twirl.            

After you've twirled each section, move it away from the rest of your hair and gently twist it between your fingers to squeeze out a little excess moisture so it will dry more quickly. Or alternately, you can use a micro-fiber towel, dry paper towels or a t-shirt. A word of caution: Don't squeeze too hard if your hair tends to have a weaker curl pattern, is less prone to natural clumping, or tends to be dry. Since your conditioner and/or gel acts as setting lotion or “glue” for maintaining styling hold, some of that cohesion may be lost if you ring out too much moisture.    

Below is the finished wet set from 3 different angles. 


The hair at the nape looks a little unruly due to super-short length.


For best results, allow your twirls to dry in the open air with minimal disturbance. Looser twirls that are less dense will dry more quickly than tighter, more densely packed twirls. If you use thermal heat -- a blow dryer or hood dryer -- it may still take a long time for your hair to dry because the air current can't reach the hair hidden deeply within each twirl. You may have to loosen the twirls with a finger as the air hits each one. 


The set is dry. Now what? ... Time to birth the curls! 

Birthing: Each section should be dry before the curls are touched or birthed. I coined the term “birth” (in the context of hair) to describe the act of dividing or subdividing a twirled section of hair to create more twirls that are smaller in diameter.

Birthing makes the hair look less contrived, more natural and tends to increase volume. You are splitting, or separating, each twirl when you birth it. Birthing from the base of the curl down will work best on the chunkier twirls. You birth by lifting the twirl a bit and gently twisting it in the opposite direction it's curling in, unwinding it slightly. When the curl you're holding looks loose at the base, you should see at least one gap of space in it. Take a finger from your other hand and gently part the curl in two by pulling the hair apart at that gap.  


As you can see (from left to right): 
an unbirthed curl, 
a curl birthed once, and 
a curl birthed twice. 
                                                                                                                       

Birthing the tighter/smaller sections may require you to start separating from the bottom. It's the same process: gently begin un-twirling the section and locate a gap where you can place your finger and separate the curl. If you cannot find a gap in the sectioned curl, gently create a separation by splitting the curl somewhere with your finger and birth it as best you can. Note that you can birth each section as many times as you want for the look and level of body you want to achieve. The more you birth, the less exposed any unseemly parts in your scalp will be. I'm sure there are other techniques for pulling curls apart. Whatever works! This may sound complicated, but as you do it, you'll see how easy it is. It takes me about 5-6 minutes to birth a set of 4 twirls into maybe 30 twirls for my entire head. It may take you a lot less time. I have an extreme amount of hair. 

Arranging bangs: If you have bangs and want full control over how they'll look after your set, finger twirl them separately or simply pull them out of the way and arrange them as you normally would.

Here's another reminder of what Naomi looks like both before and after the Temple Twirling set. I bet you'll look great too ;)   


More about TTM

TTM is not an “exacting” method, per se, although it offers structure. When I do this set on my hair, it's just about taking the natural curl I have and creating something fresh and playful, without the use of rollers or styling tools (other than a comb), or harmful chemicals. It's about having fun! 


The Temple Twirling Method (TTM) is alternately called the TTM set, or the Temple Twirling set.

The Skip Curl Method is most similar to my Temple Twirling Method, in so far as both methods involve the use of fingers to define an already present curl pattern. TTM, however, is far less time and energy consuming than SCM. TTM uses far fewer sections and there is no tedious additional step of "skipping" each curl, which the Writer, based on her research, finds unnecessary. 

The Unicorn Method is a technique that relies on the setting of a single curl.  

* Birthing is the the word I coined to describe the act of dividing or subdividing a twirled section of hair to create more twirls that are smaller in diameter. It's a specific way to separate curls. Birthing helps create the desired amount of curl and body. Directions on how to birth hair are located in the “Technique” section of this post.