Intro (Includes before/after pics)
Technique (Includes a step by step guide)
More about TTM
Introduction
Back when I was a kid, my mom decided the best way to handle my naturally curly, thick mane was to lazily throw it into a high ponytail so everything was reduced to a single curl that looked like this:
 |
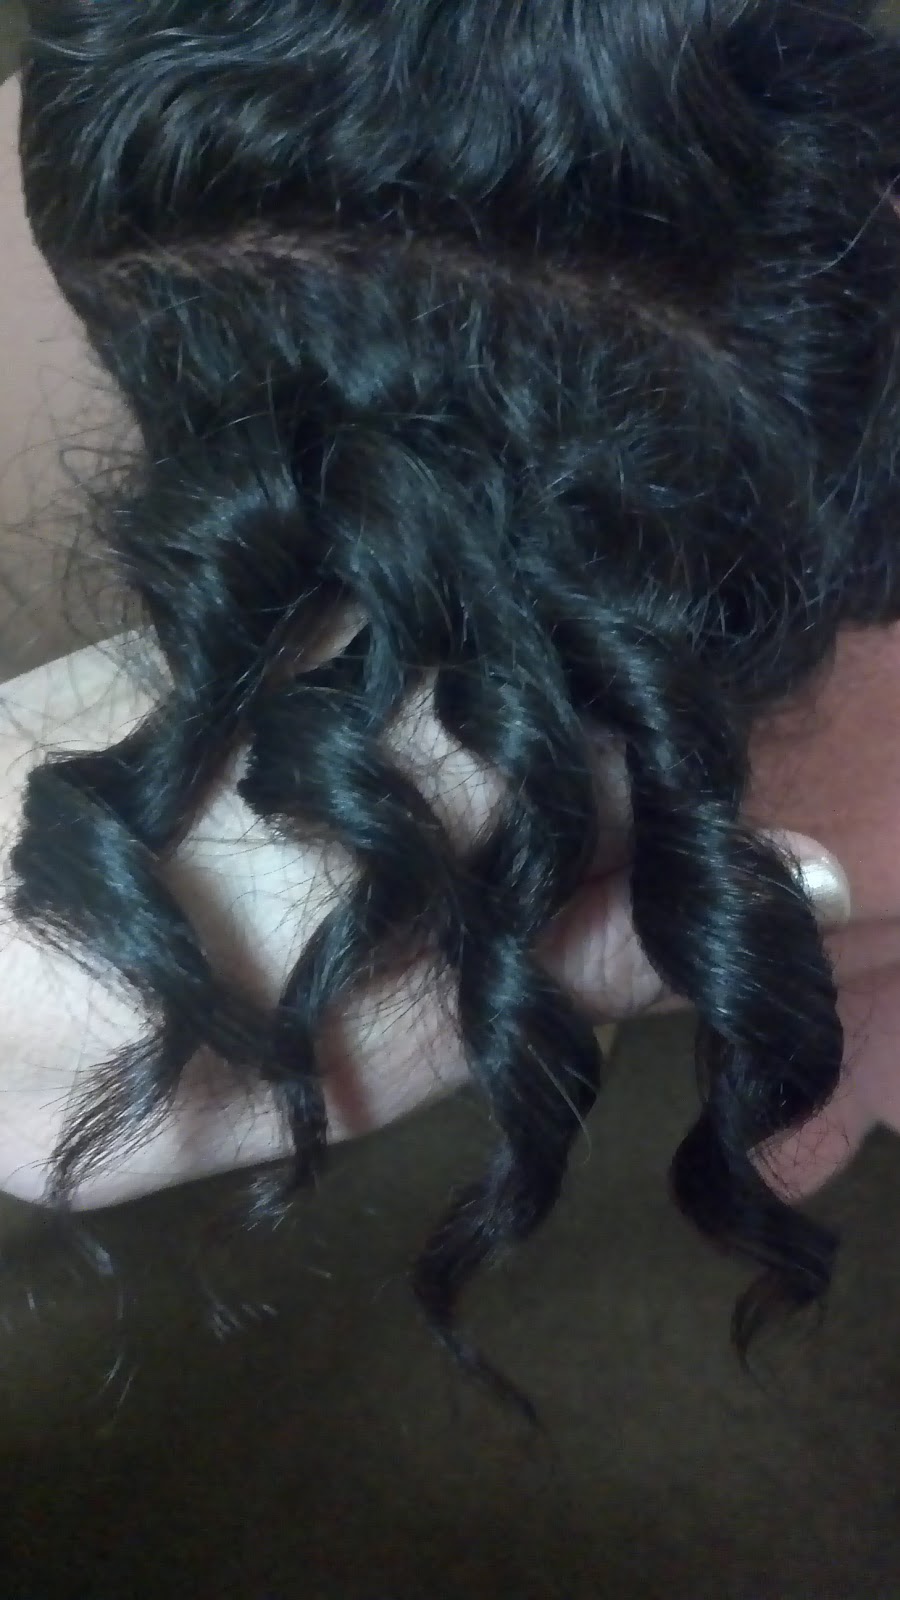
| This is one of my curls today, w/color boost added in Picasa. |
Here's an example of this style on Jessica Alba, except my one curl was positioned much higher, at the crown of my head:

My mom whirled all that curly hair into a single cyclonic configuration, using one or two fingers and the edge of a comb. (I doubt the comb was necessary.) By throwing my hair back into one “twirly curl”, she was taking advantage of curly hair's natural tendency to spiral and clump. And that heinous style was easy to create and low maintenance for her.
Reminiscing about that odd hairstyle led to some experimentation and something I created and call the Temple Twirling Method. It's named after Shirley Temple, the actress and singer. While wet, the look of the TTM set mimics Shirley's hair, although the finished look can be modified to look more natural and less “polished”. Here are quick before and after pics. It's my hair. Please ignore that ungraceful “shelf” of hair in the before pic:
Before

After
.jpg)
Not better or worse, just different IMO. The is a close up shot, to emphasize the
difference in curl pattern.
The Temple Twirling Method (TTM) * is created by the simple twirling action of one or two fingers. TTM is one more organized approach to curly styling. It takes advantage of curly hair's natural tendency to clump and spiral. It is most similar to Jonathon Torch's Skip Curl Method * and somewhat like the Unicorn Method * … Admittedly, I'm just too lazy to form dozens of small curls and make the unnecessary “skipping” motion for each curl as required by The Skip Curl Method. The Unicorn Method may work for some, but it turns my curls into an undefined mess.
Who the TTM set works best on: Ideally, your hair will have a natural tendency to clump and you will probably have a strong curl pattern. This can be any curl “type”, but my best guess is this set will usually work best for curls ranging from 2c to 3c (curl diameter size).
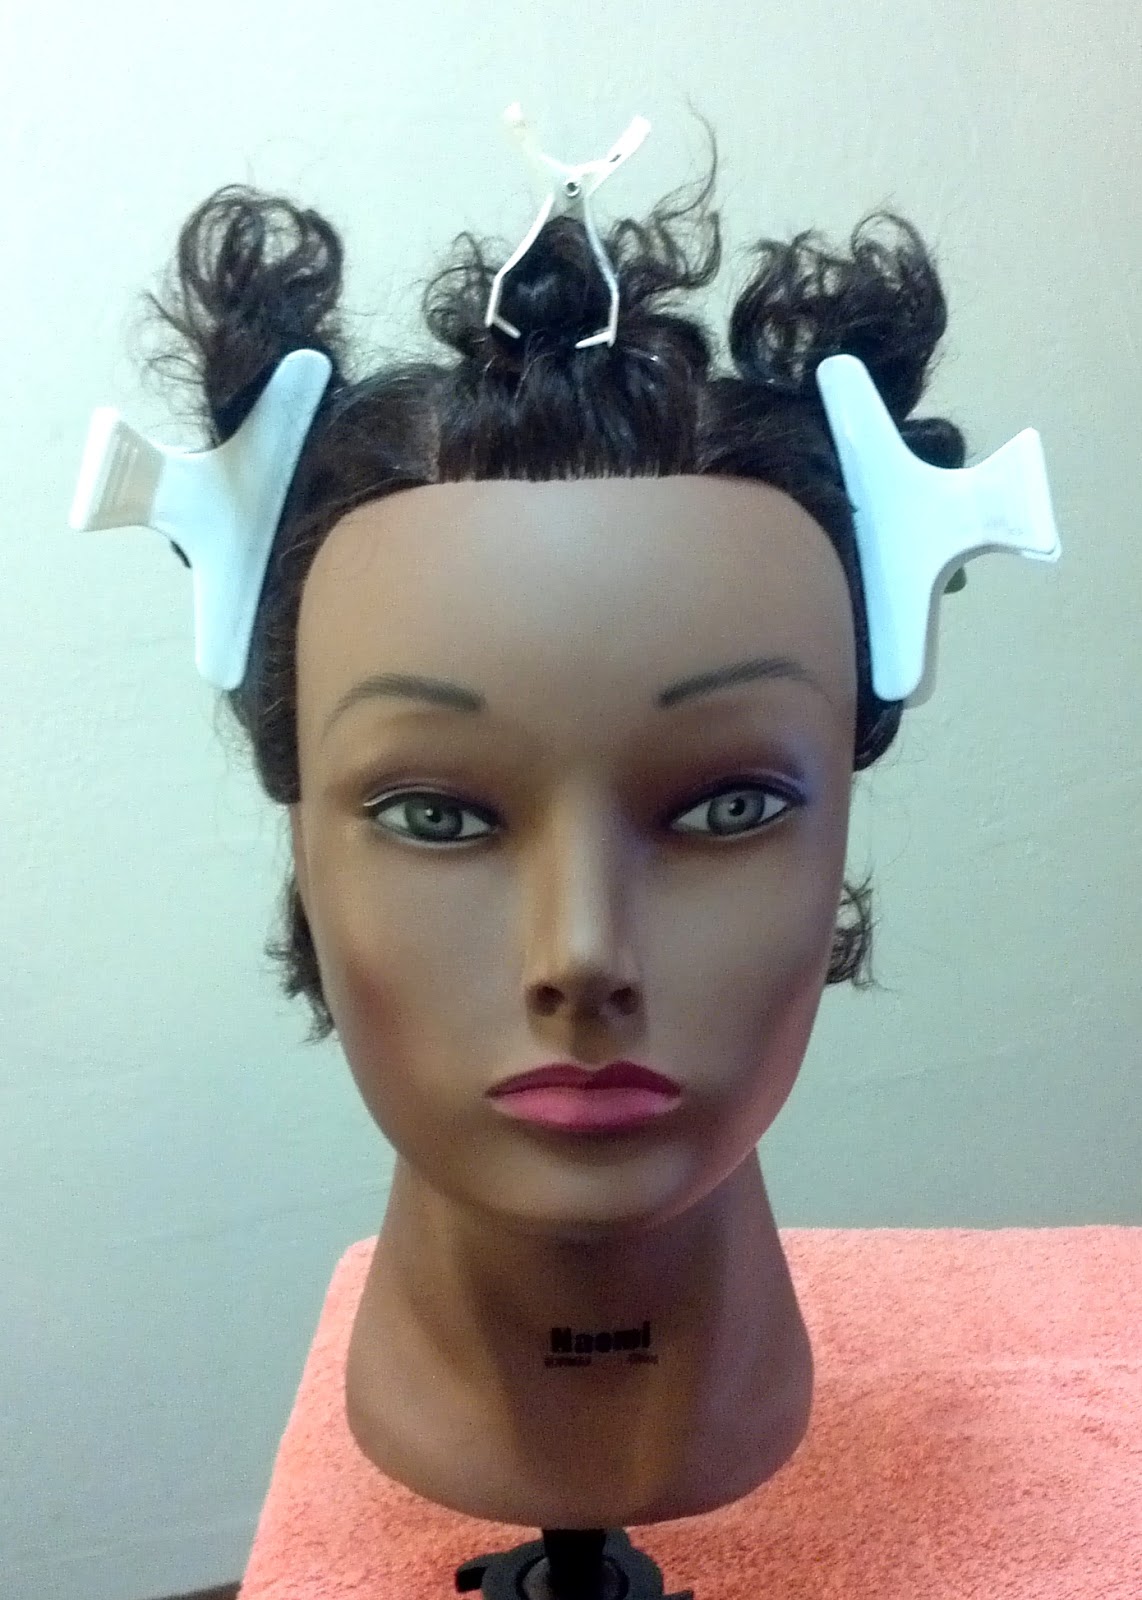
I did a TTM set on Naomi, a beautiful cosmetology mannequin head I recently bought. She came with longer hair but I cut it short.
Here are pics of Naomi's hair before and after the TTM set.


Once dry, more volume can be attained by birthing * (separating) the curls even more than I did here. I'll explain that method below.
Technique
Arranging sections: After clearing tangles from your wet hair, apply a liberal amount of leave in conditioner and/or styling gels/foams, etc. Conditioner alone can act as a setting lotion for the “twirls” you create, depending on how much your hair tends to clump, and the relative humidity in your area. If you use too little conditioner, the curls may not clump well. An excessive application will reduce volume and may weigh hair down. Better to err on the side of excess, because you'll be squeezing moisture from each section later in this process.
After applying product, section hair. Depending on how much time I have, I usually part my hair into about 4 to 6 sections, but up to 9 works well for me. You don't have to be exact. Basic linear parts should be fine. Diagonal parts are trickier, but the hair will lay more naturally once it's dry and birthed. Here are some views of linear sectioned hair from various angles:


Finger twirling each section: Twirl each section of hair around you finger, either clock-wise or counter-clockwise. You can use one hand or two, whatever feels most comfortable. My approach is below (quick demo on dry hair):
Using one hand
Using both hands
Here are some "finished" twirls:


For added volume: The larger the sections and the thicker the finger twirls, the more volume you'll get and the looser your curls will be. You can vary section sizes for more or less volume at different parts of the head. For example, for volume on top, form larger twirls at the crown. I like to position crown curls at a 90 degree angle for maximum volume, like this:


Position your hair.
Twirl it.
Lower your twirl.
After you've twirled each section, move it away from the rest of your hair and gently twist it between your fingers to squeeze out a little excess moisture so it will dry more quickly. Or alternately, you can use a micro-fiber towel, dry paper towels or a t-shirt. A word of caution: Don't squeeze too hard if your hair tends to have a weaker curl pattern, is less prone to natural clumping, or tends to be dry. Since your conditioner and/or gel acts as setting lotion or “glue” for maintaining styling hold, some of that cohesion may be lost if you ring out too much moisture.
Below is the finished wet set from 3 different angles.


The hair at the nape looks a little unruly due to super-short length.
For best results, allow your twirls to dry in the open air with minimal disturbance. Looser twirls that are less dense will dry more quickly than tighter, more densely packed twirls. If you use thermal heat -- a blow dryer or hood dryer -- it may still take a long time for your hair to dry because the air current can't reach the hair hidden deeply within each twirl. You may have to loosen the twirls with a finger as the air hits each one.
The set is dry. Now what? ... Time to birth the curls!
Birthing: Each section should be dry before the curls are touched or birthed. I coined the term “birth” (in the context of hair) to describe the act of dividing or subdividing a twirled section of hair to create more twirls that are smaller in diameter.
Birthing makes the hair look less contrived, more natural and tends to increase volume. You are splitting, or separating, each twirl when you birth it. Birthing from the base of the curl down will work best on the chunkier twirls. You birth by lifting the twirl a bit and gently twisting it in the opposite direction it's curling in, unwinding it slightly. When the curl you're holding looks loose at the base, you should see at least one gap of space in it. Take a finger from your other hand and gently part the curl in two by pulling the hair apart at that gap.


As you can see (from left to right):
an unbirthed curl,
a curl birthed once, and
a curl birthed twice.
Birthing the tighter/smaller sections may require you to start separating from the bottom. It's the same process: gently begin un-twirling the section and locate a gap where you can place your finger and separate the curl. If you cannot find a gap in the sectioned curl, gently create a separation by splitting the curl somewhere with your finger and birth it as best you can. Note that you can birth each section as many times as you want for the look and level of body you want to achieve. The more you birth, the less exposed any unseemly parts in your scalp will be. I'm sure there are other techniques for pulling curls apart. Whatever works! This may sound complicated, but as you do it, you'll see how easy it is. It takes me about 5-6 minutes to birth a set of 4 twirls into maybe 30 twirls for my entire head. It may take you a lot less time. I have an extreme amount of hair.
Arranging bangs: If you have bangs and want full control over how they'll look after your set, finger twirl them separately or simply pull them out of the way and arrange them as you normally would.
Here's another reminder of what Naomi looks like both before and after the Temple Twirling set. I bet you'll look great too ;)
More about TTM
TTM is not an “exacting” method, per se, although it offers structure. When I do this set on my hair, it's just about taking the natural curl I have and creating something fresh and playful, without the use of rollers or styling tools (other than a comb), or harmful chemicals. It's about having fun!
* The Temple Twirling Method (TTM) is alternately called the TTM set, or the Temple Twirling set.
* The Skip Curl Method is most similar to my Temple Twirling Method, in so far as both methods involve the use of fingers to define an already present curl pattern. TTM, however, is far less time and energy consuming than SCM. TTM uses far fewer sections and there is no tedious additional step of "skipping" each curl, which the Writer, based on her research, finds unnecessary.
* The Unicorn Method is a technique that relies on the setting of a single curl.
* Birthing is the the word I coined to describe the act of dividing or subdividing a twirled section of hair to create more twirls that are smaller in diameter. It's a specific way to separate curls. Birthing helps create the desired amount of curl and body. Directions on how to birth hair are located in the “Technique” section of this post.